
Hello, all the Perfectionists! This article is on Pink Glitter Cut crease Makeup Tutorials. I have prepared this tutorial specially for those girls who love Pink Colour and especially glitter (Like me!). Almost all the girls love Pink colour and of course glitter too. That is why Pink colours are known as Girl’s Colours in the entire Universe.
This Pink (Pink Vibrant Makeup Tutorial) Makeup is very Glittery and is perfect for Dates, Dinners, Parties, Valentine, and Homecoming. Prom is another good occasion for this makeup. Also, there are no age restrictions for applying this makeup because it suits on all age groups (Just minimize some makeup products if you are in your early teens).
 This Video tutorial is made by Robyn. She is an Amazing and Talented Makeup Artist. She makes Makeup Tutorial on Youtube and posts amazing yet inspiring Makeup Ideas on Instagram (All Makeup Tutorials and Idea are done by herself, can you imagine!). Her Instagram is @BeautyWithRob. She has a Youtube Channel with the name “Beauty with Rob”. She posts mind-blowing makeup & beauty ideas every week, so do subscribe to her Channel because you will learn a lot from her Tutorials.
The Link to this Video is here >>>
“Pink Glitter Cut Crease Makeup”
Step by Step Tutorial:
1: First of all, like I always say that clean your face by using a good cleanser. Try using a natural cleanser. Cleansing before makeup is very important because you need to get rid of dirt, old makeup, pollution or any other thing that could disturb the makeup base. You can try this Milk Jelly Cleanser from Glossier.
.
.
.
2: After applying the makeup base, proceed to the eye makeover. We are currently using ABH (Anastasia Beverly Hills) Renaissance Palette. First, cover the crease of your eyes with the Burnt Orange in this palette. Just use it in the crease.

.
.
3: The next shade we are using is Love Letter from the same ABH Palette. It is a bit darker Raspberry Colour with matte coverage. Just use it over Burnt Orange Shade. Give a slight curve at the end of the crease. It will define the shape of the eye.

.
.
4: Now, take a brush and blend the Love Letter Shade. Keep blending it until you get it right.
.
.
.
5: Now take Buon Fresco Eye Shade from the same ABH Palette and use it with a flat brush. It resembles the lavender colour and is also matte. Use this shade on the crease (The one you have just made) and blend out the harsh line.
.
.
.
6: Take Venetian Red (It is more like a Crimson Colour) from ABH Palette and use it over the crease. Also, blend this colour using a small brush. Always remember one thing your makeup will only look good if you have done blending otherwise it will look so bad.
.


.
.
7: We are going to use the concealer now. The concealer used in this tutorial is Mac Prolonger Wear Concealer. Use a flat concealer brush and apply the concealer on the eyelids in such a way that it touches the border of the crease. Do remember that concealer is used to shape up the crease so use it with great care.
.
.
.
8: Let’s move on to the next eye shades including Antique Bronze (More like a Metallic Brown shade) and Cyprus Umber (A bit Darker Coffee Colour, you can say dark brown as that of Cadbury Chocolate). We are using the 2 Dark Brownish Shades on the lower side of the crease. Once you are done applying it, blend it with a brush.
.


.
9: Let’s move on to the face. We are using a Primer from NYX called Angel Veil primer. Just put it on your face normally.
.
.
.
10: Now use Stila All Day Liquid Eye Primer on the eyes where you have put the concealer before (This is the place where we will apply the Glitter). Use a brush to apply it on the eyes.
.
.
.
11: Glitter Time! This is my favourite part of this tutorial. I don’t know why I love Glitter so much. Ok, we are using NYX Face n Body Glitter and the shade is Rose. Just put it on the Eye Lids. Use a brush to set it right. Some people like to apply the glitter with the help of their finger but I prefer a brush. Be careful when applying it under the Crease.
.


.
.
12: Apply a good Eye Liner on the Eyes. Try not to mess up the Glitter with the Eye Liner. A better way is to take some pause before applying the eyeliner because it will allow the Glitter to settle down.
.
.
.
13: Take a brush and remove the glitter from your face (Becuase glitter might fall on your nose, cheeks e.t.c.). Now, apply a Base/Foundation you like. The base/foundation we are using in this tutorial is of Loreal True Match Foundation. Use a beauty blender to blend it perfectly.
.
.
.
14: Now, use a concealer of your choice. The Concealer in this tutorial we are using is from Maybelline Fit Me Collection but I really recommend Stretch Concealer from Glossier. It is really good and gives a very natural look. I am really impressed from this Concealer because it imparts a natural look to the skin. Their Concealer can cover up the Dark Circles, Zits and Redness (A complete Package for us lol). Also, it comes in 5 Shades.
.
.
.
15: Blend the concealer with a beauty blender. I am again reminding that Makeup and Paintings always look Spectacular if you blend them well. Otherwise, you will end up with just coloured lines not Makeup or a Painting.
.
.
.
16:Ok, let’s move on to the contouring part. Leave this part if you have very sharp facial features because contouring won’t suit you (I have very sharp facial features and I love contouring but unfortunately it doesn’t suit me). We are using Sleek Makeup Cream Contour Kit: Medium. One more thing! Contouring depends on the face shape. So, you should check which type of contouring is appropriate for your face shape. I am not describing the contouring much because it cannot be described for everyone. But we will do a contouring post soon.
.
.
.
17: Blend the contouring with a beauty blender.
.
.
.
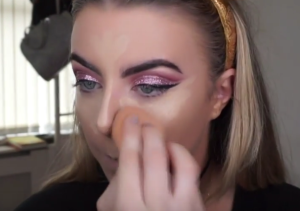
18: After it, take RCMA No Colour Powder. Just apply it on all the areas where you have applied the concealer because it helps set up the Concealer. Just leave it for some time and remove the extra powder from your face using a clean brush.
.
.
.
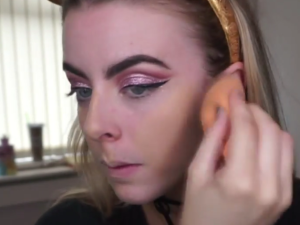
19: Use a Face Bronzer if you like. The one we are using in this tutorial is Charlotte Tilbury Filmstar Bronze and Glow Pallette. After this use a Contour Kit to Contour your face.
.
.
.
20: Aren’t we forgetting something? Yes, it is the highlighted part. Ok, use a good highlighter for your face. We are using Sleek Makeup Highlight Palette – Solstice but you can use anyone you like. I personally recommend using Haloscope from Glossier. Its application is smooth and it is not so sticky or too creamy like other cream highlighters I have tried so far. It sets like it is a part of the skin and is perfect for a nice look. Also, It is not even glittery but just a nice shimmer.
.
.
.
21: We are going for the blush now. The blush we are using in this tutorial is Sleek Makeup Blush Palette – Santa Marina. Just apply like you do normally.
.
.
.
22: Apply Mascara on the eyes. Just use the one you like.The one used in this tutorial is Charlotte Tilbury Legendary Lashes Mascara.
.
.
.
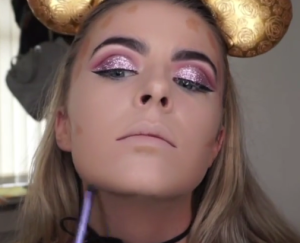
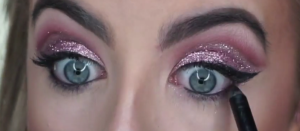
23: We are using a black pencil to line up the lower lash line area. This will really make the eyes look more beautiful.
.
.
.
24: Now use all the shades you have used on the Crease to blend out the black line you have created on the lower lash line. Also, add a little bit of white shimmer in the tear drop area.
.


.
.
25: An important thing which could enhance the look of your eyes is perfect eyebrows. The tutorial has not shown the Eye Brow Makeup. You can use Glossier’s Boy Brow. It’s kinda good. It helps make your Eyebrows thicker and manageable. Also, it comes in 3 Shades.
.
.
.
26: Lip Colour is one of the most important parts of makeup. We are using Kylie Cosmetics – Koko K Liquid Lip Colour. Also, you can try a Lip Gloss on it to give it a more Glossy and Shimmery look.

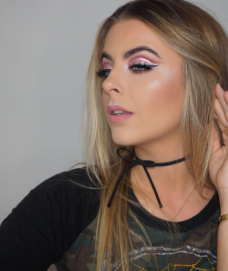
Final Look:


#Glossy n #Gittery #Pink are the perfect hashtags for this Makeup Tutorial. It is Glossy n Glittery and just perfect for a Pink Girly. This reminds me of #GlossierPink . It is a new brand of Natural Looking products. They promote natural looks with few makeup products. They have a nice range of makeup. You should check their Beauty Product Range, I am sure that you will love it. I personally love their perfecting Skin Tint and Generation G Lipsticks.


Wish I didn’t suck at makeup so I could do this
LikeLiked by 1 person
I am sure that you can get it right. It is so easy.
LikeLiked by 1 person
I wouldn’t put it past myself to screw up
LikeLiked by 1 person
Such a gorgeous look! Good job!
LikeLiked by 1 person
Thank you so much for your kind comment! I am glad you liked it.
LikeLiked by 1 person
You look fab ❤
LikeLiked by 1 person
Thank you so much for appreciating but it is not me.
LikeLiked by 1 person
Love this look you look gorgeous 😘
LikeLiked by 1 person
Thank you so much for liking it.
LikeLike